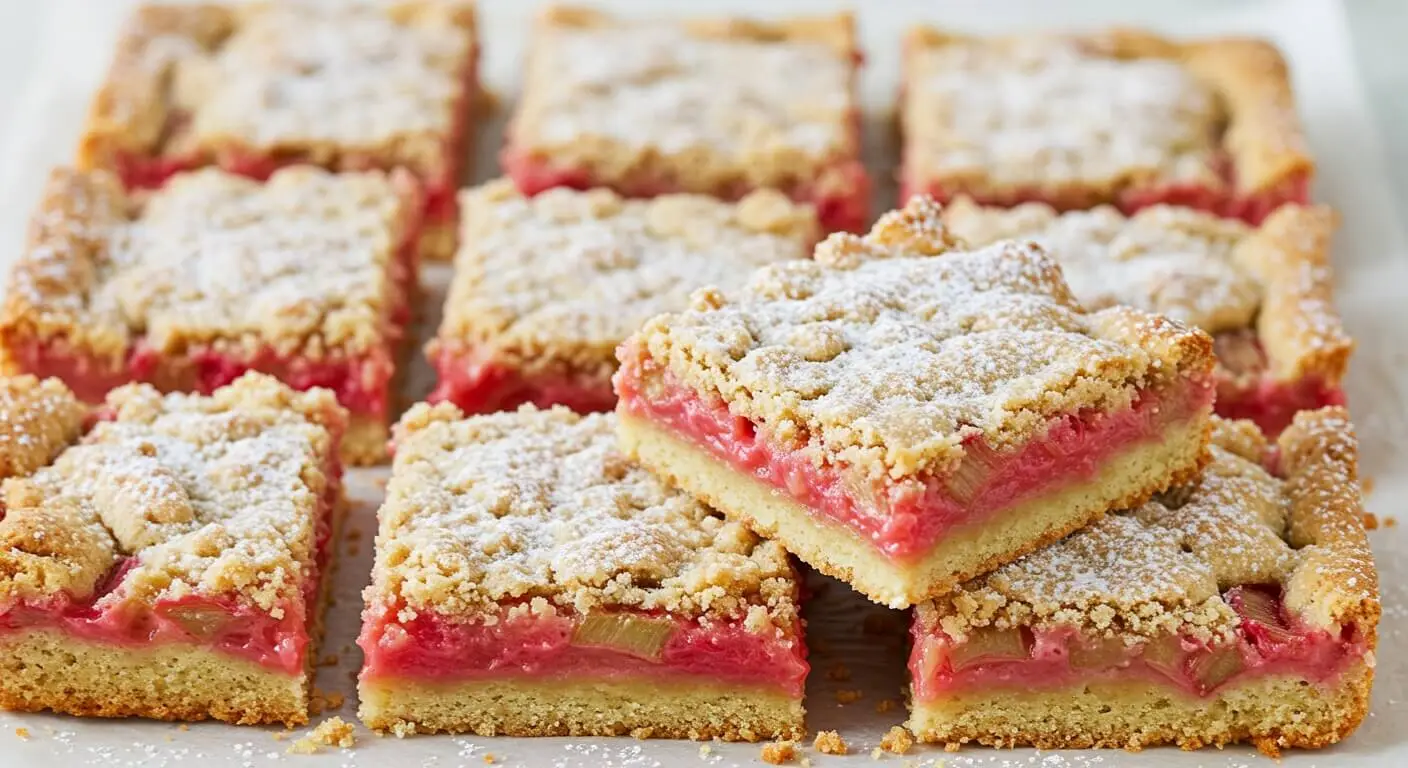
When it comes to desserts that combine the best of sweet and tart flavors, few can compete with the delight of rhubarb bars. These bars offer a delectable mix of a buttery, crumbly crust, tangy rhubarb filling, and a smooth, creamy layer that makes every bite feel like a bite of heaven. If you’re looking for a recipe that blends nostalgia, simplicity, and a bit of sophistication, this rhubarb dream bars recipe is sure to become a staple in your dessert repertoire.
Why You’ll Love These Rhubarb Bars
There’s something special about rhubarb, isn’t there? Its bright, tart flavor makes it the perfect ingredient for a dessert that balances sweetness and acidity in a way that keeps you coming back for more. Whether you’ve made rhubarb pie, jam, or cobbler in the past, these rhubarb bars bring a fresh, fun twist to the classic flavors you love.
What sets these bars apart is their layered structure, which combines a crumbly base, a tangy rhubarb filling, and a custard-like top that melts in your mouth. The texture contrast between the buttery crust and the smooth filling is just one of the reasons you’ll fall for this recipe. Plus, rhubarb is often considered a springtime treat, making it the perfect dessert to usher in the warmer months.
But these rhubarb bars aren’t just about taste—they’re incredibly easy to make, too. Whether you’re an experienced baker or just getting started, this recipe is a simple, no-fuss way to enjoy rhubarb in all its glory. Get ready to bring a little joy into your kitchen with these delightful bars.
Ingredients You’ll Need
Before we dive into the baking process, let’s take a look at the ingredients you’ll need. Fortunately, the list is simple, and many of these items are likely already in your pantry.
Key Ingredients:
| Ingredient | Quantity | Notes |
|---|---|---|
| Rhubarb | 2 cups, chopped | Fresh or frozen |
| Sugar | 1 cup | Adjust sweetness |
| Butter | 1/2 cup | Melted |
| Flour | 1 cup | All-purpose flour |
| Eggs | 2 | Room temperature |
| Vanilla extract | 1 tsp | Optional but recommended |
Ingredient Substitutions:
- Butter: If you prefer a dairy-free option, substitute with margarine or coconut oil.
- Sugar: You can use coconut sugar or a sugar substitute like stevia if you’re watching your sugar intake.
- Flour: For a gluten-free version, use almond flour or a gluten-free all-purpose flour blend.
These simple ingredients come together to create something extraordinary—so let’s make sure you have them all ready to go before we begin.
How to Make Rhubarb Bars
Now that you have your ingredients, let’s get baking! This recipe is as straightforward as it gets, and with just a few simple steps, you’ll have a batch of rhubarb bars that’s sure to impress. Whether you’re making them for a family gathering, a picnic, or just because you love dessert, these bars will be a crowd-pleaser.
Step-by-Step Instructions:
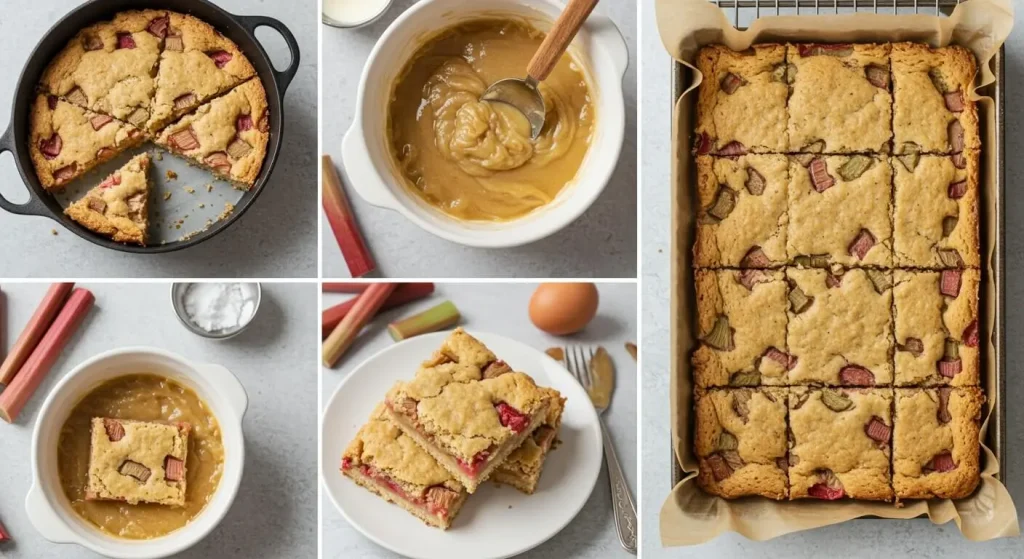
- Preheat the Oven: Start by preheating your oven to 350°F (175°C). Grease or line a 9×13-inch baking pan with parchment paper for easy removal.
- Prepare the Crust:
- In a medium bowl, combine 1/2 cup of melted butter, 1/2 cup of sugar, and 1 cup of flour.
- Stir until the ingredients are fully incorporated, forming a crumbly dough.
- Press this dough into the bottom of your prepared pan, creating an even layer.
- Bake the crust in the preheated oven for about 10-12 minutes, or until it’s lightly golden brown. This sets the base for the delicious filling.
- Prepare the Rhubarb Filling:
- While the crust is baking, chop your fresh or thawed rhubarb into small pieces (about 1/2-inch in size).
- In a separate bowl, mix 2 cups of chopped rhubarb with 1/2 cup of sugar and 2 beaten eggs.
- Add 1 teaspoon of vanilla extract to the mixture and stir everything until it’s evenly combined.
- Once the crust has finished baking, remove it from the oven and carefully pour the rhubarb filling over the warm crust.
- Bake the Bars:
- Return the pan to the oven and bake for an additional 25-30 minutes, or until the filling is set and lightly golden on top.
- A toothpick inserted in the center should come out clean when done. Let the bars cool completely before cutting.
- Slice and Serve: After allowing the bars to cool, cut them into squares. You can sprinkle a little powdered sugar on top for extra sweetness and a beautiful finish.
Baking Tips:
- Make sure to not overmix the crust dough; a little crumbly texture is key to achieving that perfect, buttery base.
- Don’t skip cooling the bars completely—this allows the filling to set and makes cutting easier.
Serving Suggestions
Rhubarb bars are delicious on their own, but they can be enhanced with a few simple additions. Here are some ideas for serving your rhubarb bars that will take them to the next level:
- Whipped Cream: Top each bar with a dollop of freshly whipped cream or a scoop of vanilla ice cream for extra richness.
- Fresh Berries: Serve with a handful of fresh strawberries, raspberries, or blueberries on the side for a fruity contrast.
- Powdered Sugar: A light dusting of powdered sugar adds a touch of elegance and sweetness to the bars.
If you’re feeling adventurous, you can also try drizzling a bit of chocolate sauce or caramel syrup over the bars for an indulgent twist. The possibilities are endless!
How to Store Rhubarb Bars
These bars are a great make-ahead dessert, but proper storage is essential to keeping them fresh. Here’s how to store your rhubarb bars:
- At Room Temperature: Store the bars in an airtight container at room temperature for up to 3 days. This is the perfect short-term storage option if you’re planning to enjoy them within a few days.
- In the Refrigerator: For longer storage, keep the bars in the fridge. They’ll stay fresh for up to 5-7 days in an airtight container.
- Freezing: If you want to make a larger batch or store some for later, these rhubarb bars freeze beautifully. Just place the bars in an airtight container or freezer-safe bag and freeze for up to 3 months. When ready to serve, let them thaw at room temperature or heat them up in the oven for a few minutes.
Additional Tips for the Perfect Rhubarb Dream Bars
To ensure your rhubarb dream bars come out perfect every time, here are a few extra tips and tricks:
- Use Fresh Rhubarb: While frozen rhubarb works, fresh rhubarb has a firmer texture and a better flavor. Look for firm, red stalks for the best results.
- Adjust the Sweetness: Rhubarb is naturally tart, so feel free to adjust the sugar levels based on your taste preferences. If you prefer a sweeter filling, increase the sugar by a couple of tablespoons.
- Add a Dash of Cinnamon: For a cozy twist, sprinkle a little ground cinnamon over the rhubarb filling before baking. It complements the tartness of the rhubarb and adds depth to the flavor.
FAQ Section
Can I use frozen rhubarb for this recipe?
Yes, you can! Just make sure to thaw the frozen rhubarb and drain any excess liquid before adding it to the filling.
Can I make rhubarb bars without eggs?
If you’re looking for an egg-free version, you can use an egg substitute like flax eggs or applesauce. The texture may vary slightly, but the bars will still be delicious!
How do I know when the rhubarb bars are done baking?
The bars are done when the filling is set and the top is lightly golden. A toothpick inserted into the center should come out clean.
How do I store leftover rhubarb bars?
Store leftover bars in an airtight container at room temperature for up to 3 days, or refrigerate them for up to a week. You can also freeze them for up to 3 months.
Conclusion: A Slice of Summer in Every Bite
Rhubarb bars are the perfect blend of tangy and sweet, making them a must-try dessert for any rhubarb lover. Whether you’re baking them for a special occasion, a family dinner, or just a sweet treat, these bars are sure to impress. Their delightful texture and vibrant flavor are irresistible, and they’re easy enough to make even on a busy day. So, why not give this recipe a try and indulge in a bite of these dreamy, tart bars? Your taste buds will thank you!
If you loved this rhubarb dream bars recipe, be sure to share it with friends and family. And don’t forget to leave a comment letting us know how yours turned out!
How Did You Like This Recipe? Share Your Thoughts!
There are no reviews yet. Be the first one to write one.

