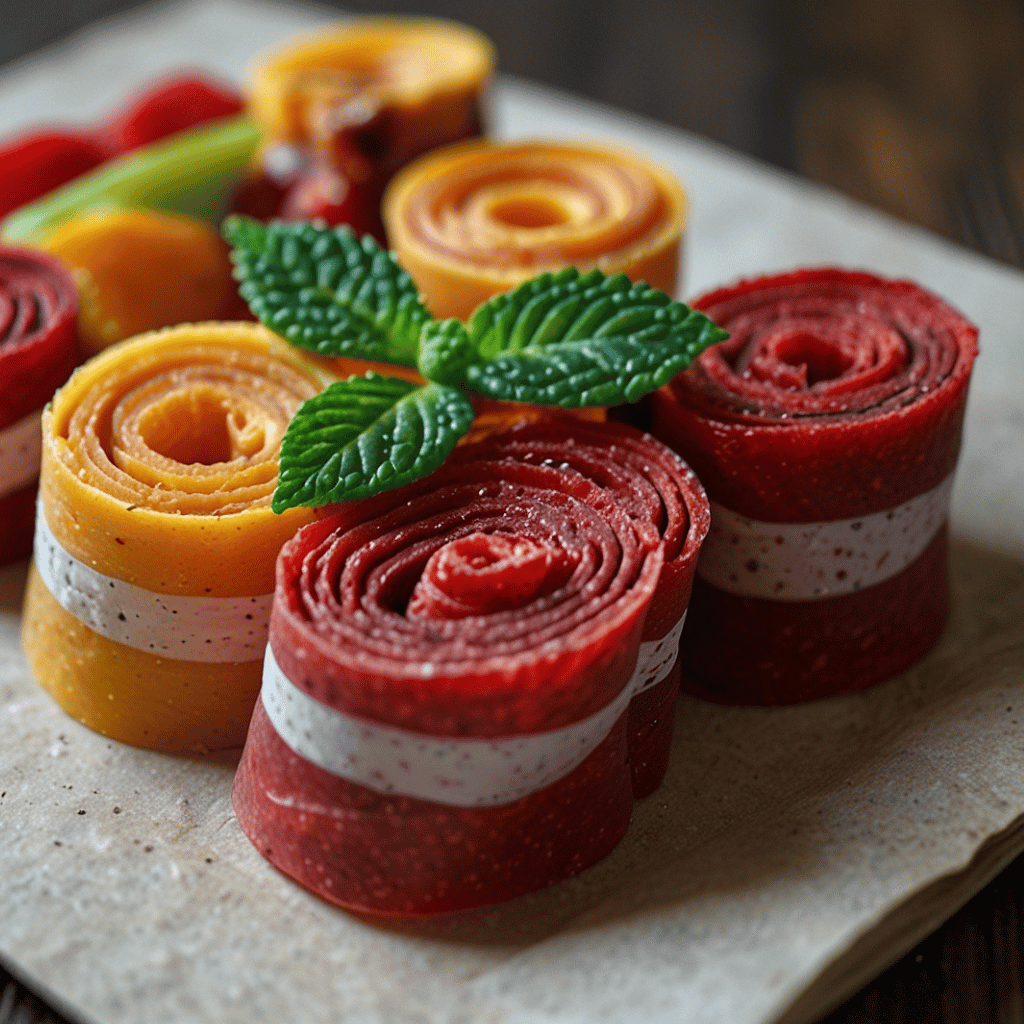
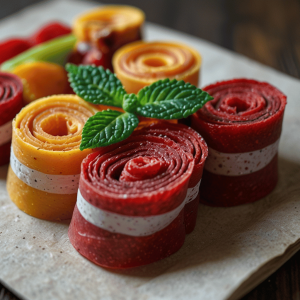
Fruit roll ups are a delightful snack made from pureed fruit that’s dried until chewy and flavorful. This homemade version offers the same satisfying taste as store-bought options, but with the added benefit of knowing exactly what goes into your snacks. Bursting with the vibrant sweetness of strawberries, these fruit roll-ups make for a perfect treat for kids and adults alike. Whether you enjoy them on the go, in lunchboxes, or as a post-workout snack, they are versatile and can be made with your favorite fruits.
You’ll Love This Fruit Roll Ups
Fruit roll ups are not just a tasty treat; they are also a fun and healthy way to enjoy fruit. This recipe allows you to customize the flavors to your liking, using various fruits to create different combinations. With no added sugars or preservatives, you can indulge guilt-free. Plus, they’re a great way to use up any overripe fruit you might have lying around. Making these fruit roll ups is a simple process that will leave you with a nutritious snack that’s perfect for any occasion.

Ingredients You’ll Need
To make these delicious fruit roll ups, gather the following ingredients:
- 4 cups fresh strawberries, hulled and sliced
- 2 tablespoons honey or maple syrup (optional, depending on sweetness preference)
- 1 tablespoon lemon juice
- A pinch of salt (optional)

Instructions
Follow these easy steps to prepare your homemade fruit roll ups:
- Prepare the Strawberries: Start by washing and hulling the strawberries. Slice them into halves or quarters to help them blend more easily.
- Blend the Mixture: In a blender or food processor, combine the sliced strawberries, honey (if using), lemon juice, and a pinch of salt. Blend until smooth. If you prefer a chunkier texture, you can blend them to your desired consistency.
- Prepare the Baking Sheet: Line a baking sheet with parchment paper. If you have a silicone baking mat, you can use that as well. Make sure it’s evenly spread to prevent sticking.
- Spread the Mixture: Pour the blended fruit mixture onto the prepared baking sheet. Use a spatula to spread it evenly into a thin layer, about 1/8 inch thick. A thinner layer will yield crispier roll-ups, while a thicker layer will be chewier.
- Dry the Fruit Mixture: Place the baking sheet in the oven set to the lowest temperature (usually around 140°F to 175°F or 60°C to 80°C). If you have a dehydrator, you can use that instead. Allow the fruit to dry for 6 to 8 hours. The mixture should be dry to the touch and not sticky when done. You can check it periodically to ensure it’s drying evenly.
- Cool and Cut: Once dried, remove the baking sheet from the oven and let it cool for about 15 minutes. Peel the fruit leather off the parchment paper. Use a pizza cutter or kitchen scissors to cut it into strips or shapes.
- Roll and Store: Roll each strip tightly and secure it with a piece of parchment paper or a twist tie.
Serving Suggestions
These fruit roll-ups can be enjoyed in various ways. Here are some ideas:
- Snack Time: Perfect for a quick and healthy snack, whether at home or on the go.
- Lunchbox Treats: Add them to your child’s lunchbox for a sweet surprise.
- Healthy Desserts: Pair with yogurt or serve with a side of whipped cream for a light dessert.
- Gifting: Wrap them up in pretty packaging for a thoughtful homemade gift.
MORE RECIPES: Oreo Ice Cream Recipe & Moist Chocolate Carrot Cake
How to Store Fruit Roll Ups
To ensure your homemade fruit roll ups stay fresh, store them in an airtight container at room temperature. They can last for up to a week this way. For longer storage, you can refrigerate them for up to a month or freeze them for up to six months. Just make sure to separate the layers with parchment paper to prevent sticking.
Additional Tips: Fruit Roll Ups
- Sweetness: Adjust the sweetness to your preference by adding more or less honey or syrup.
- Fruit Variations: You can substitute strawberries with other fruits like mango, apple, or peach. Just keep the ratios similar for best results.
- Texture: For a chewier texture, blend the fruit less and leave some small chunks. For a smoother roll-up, blend until completely smooth.
- Dehydrating Options: If you have a dehydrator, you can set it to 135°F (57°C) and check after 4-6 hours for doneness.
Fruit Roll Ups
Equipment
- Blender
- Baking sheet
- parchment paper
- spatula
- kitchen scissors
Ingredients
- 4 cups fresh strawberries hulled and sliced
- 2 tablespoons honey or maple syrup optional
- 1 tablespoon lemon juice
- A pinch of salt optional
Instructions
- Prepare the Strawberries: Start by washing and hulling the strawberries. Slice them into halves or quarters to help them blend more easily.
- Blend the Mixture: In a blender or food processor, combine the sliced strawberries, honey (if using), lemon juice, and a pinch of salt. Blend until smooth. If you prefer a chunkier texture, you can blend them to your desired consistency.
- Prepare the Baking Sheet: Line a baking sheet with parchment paper. If you have a silicone baking mat, you can use that as well. Make sure it’s evenly spread to prevent sticking.
- Spread the Mixture: Pour the blended fruit mixture onto the prepared baking sheet. Use a spatula to spread it evenly into a thin layer, about 1/8 inch thick. A thinner layer will yield crispier roll-ups, while a thicker layer will be chewier.
- Dry the Fruit Mixture: Place the baking sheet in the oven set to the lowest temperature (usually around 140°F to 175°F or 60°C to 80°C). If you have a dehydrator, you can use that instead. Allow the fruit to dry for 6 to 8 hours. The mixture should be dry to the touch and not sticky when done. You can check it periodically to ensure it’s drying evenly.
- Cool and Cut: Once dried, remove the baking sheet from the oven and let it cool for about 15 minutes. Peel the fruit leather off the parchment paper. Use a pizza cutter or kitchen scissors to cut it into strips or shapes.
- Roll and Store: Roll each strip tightly and secure it with a piece of parchment paper or a twist tie.